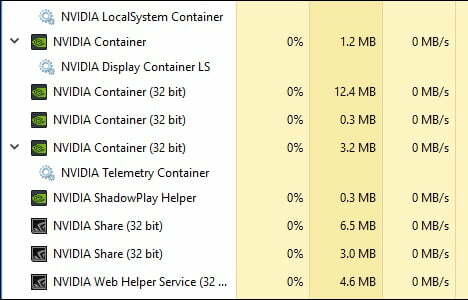
NVIDIA has a large number of background processes, some of which can misbehave and trigger a slew of issues for users. One such issue is that the NVIDIA Container process consumes much too much CPU power, slowing down the machine and interfering with other processes.
There are many different triggers for this problem, all of which are relatively new and have been identified for the most recent versions of NVIDIA drivers. You don’t have to worry about the methods being outdated.
NVIDIA Container, how to fix it quick ?
Install NVIDIA Drivers from the Past
A significant number of users who have experienced this issue have recently modified their graphics drivers. We can almost guarantee that something about these drivers isn’t quite right, causing the process to use more resources than it should. In that case, the best course of action is to revert to the previous working set of drivers and wait for NVIDIA to release a new update.
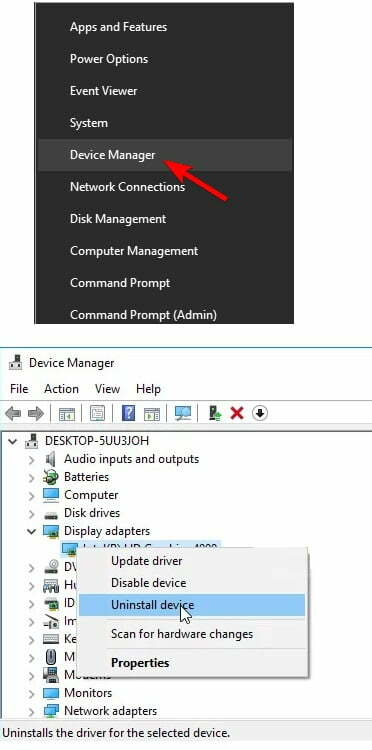
1. Go to Device Manager. To do so, click Windows + X Pick Device Manager from the list when the Win + X menu appears. Right-click on your graphics card and select Uninstall Device from the Display Adapters section. Click Uninstall to confirm, then wait.
2. Go to nvidia.com, official website. Look for your graphics card’s driver. Click Search after entering the necessary details about the card and your operating system.
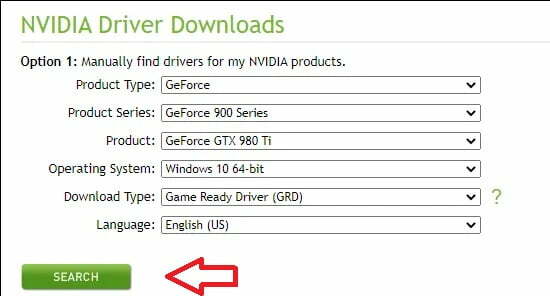
There should be a list of all available drivers. Scroll down until you find the appropriate entry, then click on its name and then the Download tab. To install it, save it to your monitor, open it, and follow the on-screen instructions. Check to see if nvidiacontainer.exe is still using a lot of CPU!
In the vast majority of instances, it will be beneficial.
If the first strategy does not work, try the second “Disable NVIDIA”.
Disable NVIDIA
The NVIDIA Container is a service that runs alongside NVIDIA software and is used to keep track of any of your computer’s logs, actions, and other details. It can be used to report bugs to NVIDIA or to report unwanted activity.
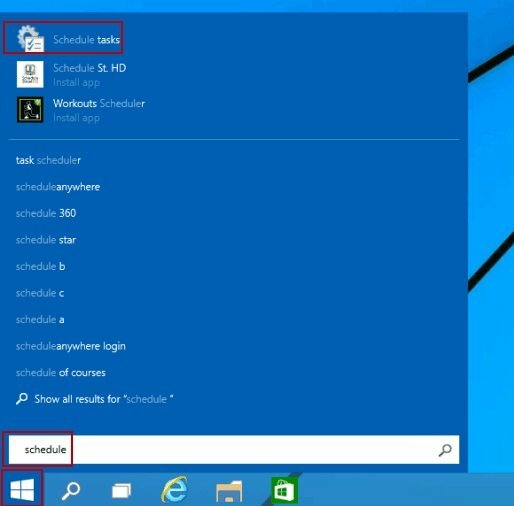
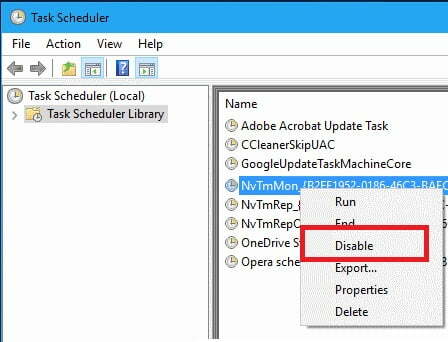
- Go to Task Scheduler. Pick Schedule tasks from the results by clicking the lower-left Start button and typing schedule in the empty window.
2. Now switch to the Library of Task Scheduler. Find NvTm tasks like the ones seen below. Select Disable from the context menu that appears when you right-click on them. Repeat the procedure with NvTm for each entry.
If the second method does not perform, try the third method “Uninstall GeForce”.
Uninstall GeForce, Nvidia Container
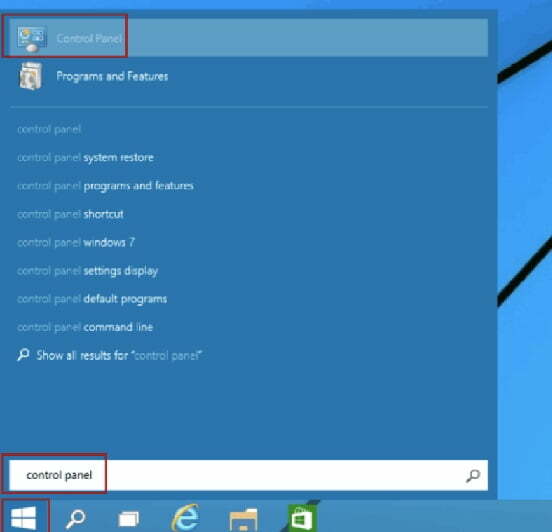
1. Open Control Panel On Windows
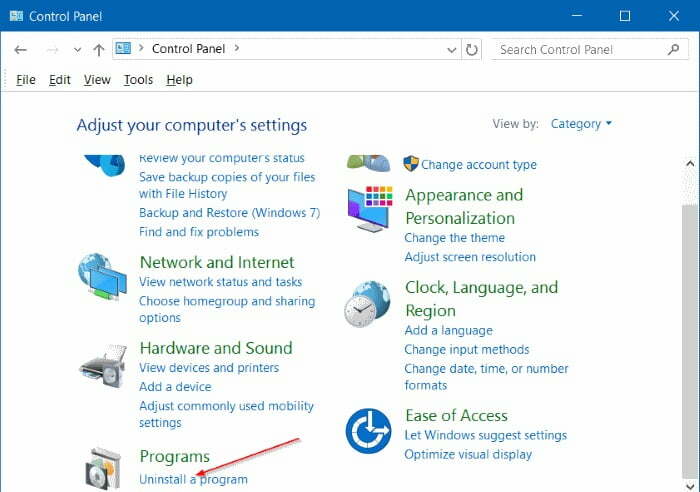
2. In Control Panel click on Uninstall a Program
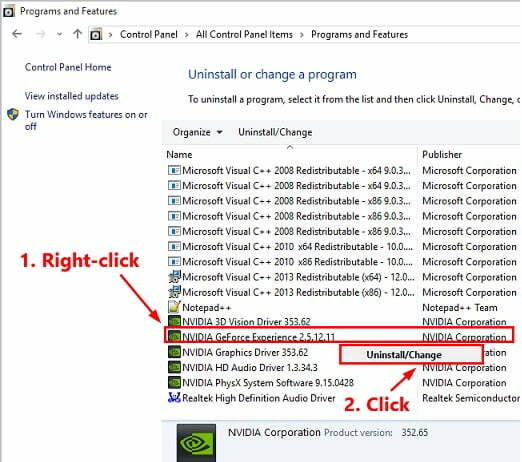
3. Locate and right-click on the listing for NVIDIA GeForce Experience in the list of programs loaded on the device. In the background menu that appears, choose Uninstall.
Note: If none of the solutions have solved the problem, we suggest that you double-check everything. If you do need assistance, consult a knowledgeable master.
Best wishes.
Read our blog and be happy.